How To Underfloor Heating
Measuring your floor, you will need to measure the room, being sure to not include permanent fixtures that you won’t be heating underneath, although you may still want to use insulation boards underneath all areas you wish to tile, such as underneath fridges etc. When you are measuring, if the area you wish to heat is exactly 7m2 you will want to use a mat that is around 10-20% smaller, this allows the necessary space that is required to be between the mat and wall. The Matt cannot be shortened, a mat too small is better than a mat too large. Loose wire cable systems do not have this problem, but are fiddlier to install.
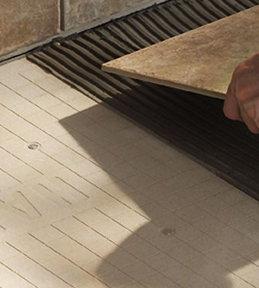
Insulation Board Installation, prep the boarded or concrete floor by ensuring it is clear from dust and is dry. The floor should be primed, acrylic primer or PVA will work but Heatflex Primer is the best because of its heat retention properties. After the primer is dried, adhesive should be spread on the floor, making sure not to spread more than one board’s size, place the board onto this adhesive bed, and continue across the entire floor. Wooden floors should also have the boards screwed onto the wood at 8 inch intervals across the whole floor. The Boards should be laid in a brick pattern; this is less of a flexible structure and supplies the perfect base for tiling onto. Insulation Boards are easily cut by a work knife, so can be manoeuvred around permanent fixtures.
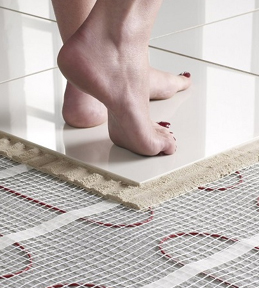
Installing a Matting System, For best results, the floor or insulation boards should be primed, acrylic primer or PVA will work but Heatflex Primer is the best because of its heat retention properties. Once primed, you should mark on the floor the areas in which you think the heater should go, a full instructional manual to this process will be included in the box with the kit. It is important to make sure the kit will be laid with the 3m cold tail in reach of the thermostat and that at least 2 inches is left between the matting and the wall, as well as other strips of matting.
Once you are happy with the markings, lay the mat out in the way you have planned. The mat is easily rolled out until a wall is met. Cut the plastic mesh netting, Do not to cut the heating cable, turn the mat and roll the mat in the desired direction, making sure to keep the matt two inches from the wall and other matting strip. Do not fix the Matt until 100% happy with where it is. The Floor temperature probe from the thermostat should be positioned within/underneath the matt so that it can read the temperature as accurately as possible. The matt can then be fixed with the double sided sticky tape already on the Mat. Once the Matting and probe is taped down, you can tile with flexible adhesive, take care when doing so, don’t scrape the wiring with the trowel.
These are just guidelines; any information/Manuals from Warmup should be followed.
Installing a Loose Wire kit, For best results, the floor or insulation boards should be primed, acrylic primer or PVA will work but Heatflex Primer is the best because of its heat retention properties. Once primed, you should mark on the floor the areas in which you think the heater should go, a full instructional manual to this process will be included in the box with the kit. Please refer to the guide when necessary, but some main points are; the heater cannot come within three inches of a wall, spacing between wires must be two inches or more, wires should run up and down the room, don’t cross wires and make sure all kits are both within the 3 metre connection range of the cold tail to the thermostat. To ensure you will cover the entire area, please refer to the manual included.
Lay the wire, following your marks, fixing the wire to the floor with little bits of tape at the ends where the cable turns, and also periodically on the straights. When you are 100% happy with the positioning, tape the wire down completely, covering the entire wire. The floor temperature probe should be positioned in between the wire so that it doesn’t cross any wires so that it can read the temperature of the system as accurately as possible
The floor probe from the thermostat should be laid in-between the wires so that it can read the temperature of the system as accurately as possible. Once the Wire and probe are taped down, you can tile with flexible adhesive, take care when doing so, don’t scrape the wiring with the trowel.
These are just guidelines; any information/Manuals from Warmup should be followed.
For Technical Support, please click the link below where the Warmup Technical department can answer your questions and queries, or please get in touch with us in the Contact us Section at the top of the page, or go to the store locator for your local store.


