Fix Floor Tiles
Before making a start with your floor tiling project, be sure you have all of the equipment you need close to hand. You should also wear safety goggles and protective gloves when cutting or trimming tiles. Good preparation is essential. Ensure that the surface to be tiled is clean, dry and flat and that any holes and cracks have been filled.
On Large Format tiles we Recommend not to do a half bond pattern. By doing a 50% offset, where the middle of a tile is exactly in line with the grout joint of the next row, you maximize the amount of unevenness, or lippage, between the tiles. Therefore, it is best not to lay them with a 50% offset but instead use the industry recommendation of an offset of no more than 33%.
Mark a line along the centre of the room and loose lay the floor tiles along the line to see how they will fit. Starting at the centre of the room, you should aim to get an even cut at each end.
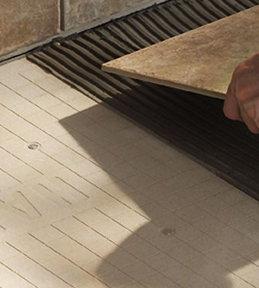
Mix the adhesive as per the instructions on the packaging and using a notched spreader, comb the adhesive evenly onto the floor. Do not spread more adhesive than you can tile in 20 minutes using a standard set adhesive. Fix the floor tiles into the adhesive using a twisting / sliding motion to ensure full contact between adhesive and tile and removing any voids beneath the surface of the tiles.
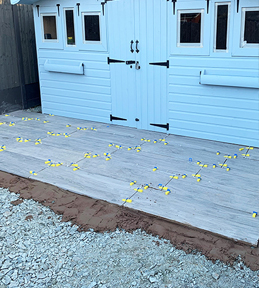
Using floor tile spacers will ensure that your tiles are evenly spaced to create uniformed grout joints and our staff will recommend the most appropriate tile cutter to ensure a professional finish. Work your way across the floor checking regularly with a spirit level that the floor tiles are flat.
Excess adhesive should be wiped away immediately using a damp cloth or sponge. Once your floor tiles have been fixed, allow at least 24 hours for the adhesive to dry before grouting unless you have used a "rapid setting" adhesive. At all times you should follow the adhesives and grouts manufacturer’s instructions at all times. Using a grout spreader / rubber faced trowel, work the grout into the grout lines. Wipe off any excess grout with a grouting sponge, used at a 45 degree angle to ensure that the compacted grout stays in the joints, to give a professional finish.
Finally, once the grout residue has created a "haze" on the tiles, use a soft dry cloth to "buff" the tiles to a polish.
IF TILING ONTO A WOODEN FLOOR, YOU SHOULD USE ONE OF OUR FLEXIBLE ADHESIVES THAT ARE MANUFACTURED SPECIFICALLY FOR THIS APPLICATION. DETAILS ARE AVAILABLE IN-STORE


